Mastering the Casual Mat Board Hinge
- in Seven Simple Steps
Hinging is the traditional method used to mount and secure a photograph, document or artwork in a window mat. Though some professionals use alternative methods for mounting, most conservators, photographers and artists prefer hinging since a hinged work can be easily removed from a mount without damage.
Hinging materials and techniques vary in accordance with artwork size, purpose and quality of work. Archival works and the preservation of valuable documents require higher-quality supplies and more demanding techniques. But as a rule, general hinging — also called casual hinging — is the most common practice for protective mounting with decorative mat board and offers a reliable 'shelf life' for years.
Proper hinging is essential. It aligns artwork in the mat and frame, stabilizes and protects it, and adds the final professional touch that art buyers expect. Hinging isn't difficult at all with Redimat's seven simple steps:
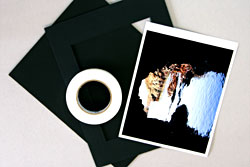
Step 1: Secure your Supplies
- Photograph or Artwork: Make sure your work is ready to be mounted, damage-free and sized of course, so you can select the right-sized mat board.
- Economy Mat board:
This board is best suited for casual hinging and all-purpose framing
of amateur photography and less valuable professional photographs,
posters, fine art prints and even craft projects. Though not for
archival work, decorative mat board is manufactured with a buffered
acid-free surface, core and backing paper that offers suitable
protection for most work.
- Mounting Board / Backing Board: Choose a backing board best suited for your work … for example, a heavy work will require a sturdier, more rigid board. Likewise, not all boards are acid-free but some work won't require archival quality boards.
- Hinging Tape: Common sense will determine the product best for your needs. Usually, quick and easy, pressure-sensitive hinging tape is the first choice for less valuable work. And most people prefer single-sided sticky tape, since double-sided tape is trickier to work with. Supplies vary; but for casual hinging, Pro White Artist Tape (pH neutral) is recommended. Available in three sizes: 1/2"x60yds, 3/4"x60yds and 1.5"x60yds rolls
Step 2: Prepare the Workspace
 You'll
also need an ideal workspace. Whether it's the studio, the kitchen
table or the kitchen floor, make sure you have a clean, dry, well-lit
and clutter-free area to work in!
You'll
also need an ideal workspace. Whether it's the studio, the kitchen
table or the kitchen floor, make sure you have a clean, dry, well-lit
and clutter-free area to work in!
You may also want to protect the flat surface of your workspace with a covering — one speck of sand can wield a lot of damage to a face-down photo! Also, be cautious about using newsprint or colored papers as a work surface, since inks can transfer from one medium to another. You'll also want a surface that's not too slippery and a covering that won't create any static charge since you'll have to center the work in the mat window. For small jobs, oversized construction paper works well, especially if it's taped to a table. Oversized butcher paper or food wrap paper right off the roll works, too.
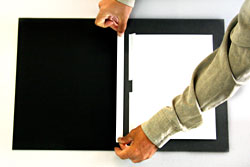
Step 3: Assume the Position
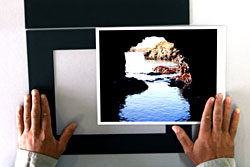
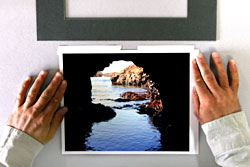
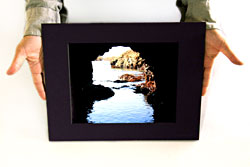
 Align
your photo or artwork as depicted in the illustration at right.
Here, this photographer is using Pro
White Artist Tape and an 11 x 14 decorative mat board with smooth
black finish. The inner dimension measures 7.5 x 9.5 and is designed
to fit 8 x 10 artwork. The backing board is all black and naturally,
measures the same size as the mat board.
Align
your photo or artwork as depicted in the illustration at right.
Here, this photographer is using Pro
White Artist Tape and an 11 x 14 decorative mat board with smooth
black finish. The inner dimension measures 7.5 x 9.5 and is designed
to fit 8 x 10 artwork. The backing board is all black and naturally,
measures the same size as the mat board.
Step 4: Align the Artwork
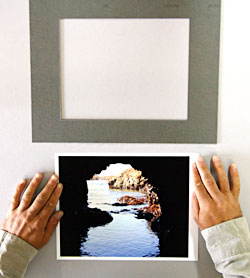
To start the hinge, turn the work over, facedown as shown — making sure there's no sand or coffee beneath!
Two hinges are ample for the weight and size of this photograph. Note that it's better to build two or more small hinges rather than one large one; this is a preferred method that protects the work. (See tips below!)
  |
Now, tear the tape from the roll — no cutting! The sticky side is down. Apply one small strip just left of center and the other just right of center along the top edge. These strips are applied on the back of the photograph or work. Gently press the tape to the back of the work. Use light pressure only. The pressure comes later!
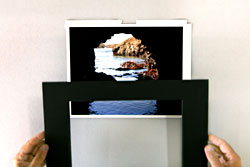
 Now,
turn the work over, as shown at right, making sure there's plenty
of space between the work edge and the edge of the table. The tape
shown is now sticky side up.
Now,
turn the work over, as shown at right, making sure there's plenty
of space between the work edge and the edge of the table. The tape
shown is now sticky side up.
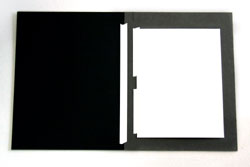
Step 5: Center the Work
 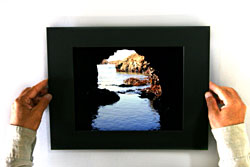 |
This step can be tricky. You want to center the work exactly before applying pressure that creates adhesion between the back of the mat board and the top of the hinge tape. No need to worry if it takes a few tries though; the adhesion bond firms slowly and unless real pressure is applied, you'll be able to easily release the tape and correct any mishaps, gaps or a crooked view. Once you're satisfied that the work is centered, apply slight pressure to the top of the window and proceed. The tape is hidden beneath, but you know where it is!
Step 6: Adjust the Hinging Mount
  |
Turn the work and mat board over again, face down. Now, apply medium firm pressure making sure the tape is smooth, unwrinkled and adhering cleanly and smoothly.
Before proceeding, you'll want to check a final time that the work is still centered and repeat the step if needed.
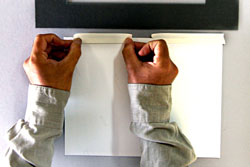
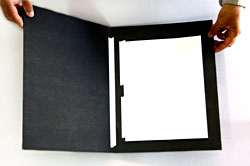
Step 7: It's a Wrap — Complete the Hinge
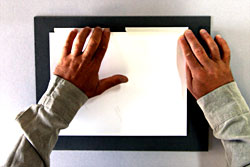
 Align
the decorative mat board edge to edge with the backing board / mounting
board. The closer the edges, the less chance of any tape showing.
No need to leave a gap for foam board, either.
Align
the decorative mat board edge to edge with the backing board / mounting
board. The closer the edges, the less chance of any tape showing.
No need to leave a gap for foam board, either.
Now apply a secondary section (or several small sections) of tape that extends almost the full length of the edge as shown. If smaller sections are used, ensure that the tape is aligned evenly and properly. Make sure the tape is smooth and apply mild pressure for slight adhesion.
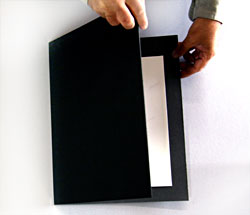
 As
depicted, you'll leave about an inch on each side so the tape won't
be visible once the board is folded, or sandwiched together.
As
depicted, you'll leave about an inch on each side so the tape won't
be visible once the board is folded, or sandwiched together.
Fold the board over and double check centering, hinge fit and edges. If you've created a perfect picture, you're ready to apply firm pressure to your final strip of hinge tape.
 |
 |
Shazaam!
- All hinges should be attached to the back of the art.
- Paper expands and contracts. By taping only the top, you're allowing the paper to expand and contract without damage.
- Tear hinges; don't cut them. Torn, feathered edges are essential to the hinging technique and ease removal if necessary.
- Match the hinge strength to the art being mounted. The hinge should be weaker than the artwork so if stressed, it will tear away first.